


Pagan Studies
Being a compendium of recipes and advice for ritual and mundane use to please and make prosperous the Practitioner.
Making a Beaded Amulet
Note: This project is for intermediate to advanced beaders.
Prayer beads are a piece of silver jewelry, shaped like a tube, worn by Buddhists and which contain an affirmation. Tibetan prayer beads are larger and more elaborate. They usually have intricate silver designs on the surface (which is shaped more like a large pendant) and set with red coral and turquoise. The back comes off of it and the owner can place an affirmation or prayer inside.

Here I have created a beaded herbal amulet which is reminiscent of the Buddhist type. You will need an assortment of beads at least 11/0 or smaller, beading needles, small scissors, and a dowel rod about ½ inch in diameter. I didn’t have a dowel so I used a penlight with the bulb part removed. I also used 4 lb. Fireline Crystal for the thread, as it hold shape and is very sturdy. You can, of course, use waxed cotton or linen thread.
I like the gourd stitch (popularly known as peyote stitch) since it stacks so nicely. Ladder stitch and/or herringbone stitch can be used if you prefer. Begin by string a row of beads around your working base. My project took 42 beads. Run another length of beading thread through them, tie off using a surgical knot, and weave the loose end through some of the beads before cutting it off.
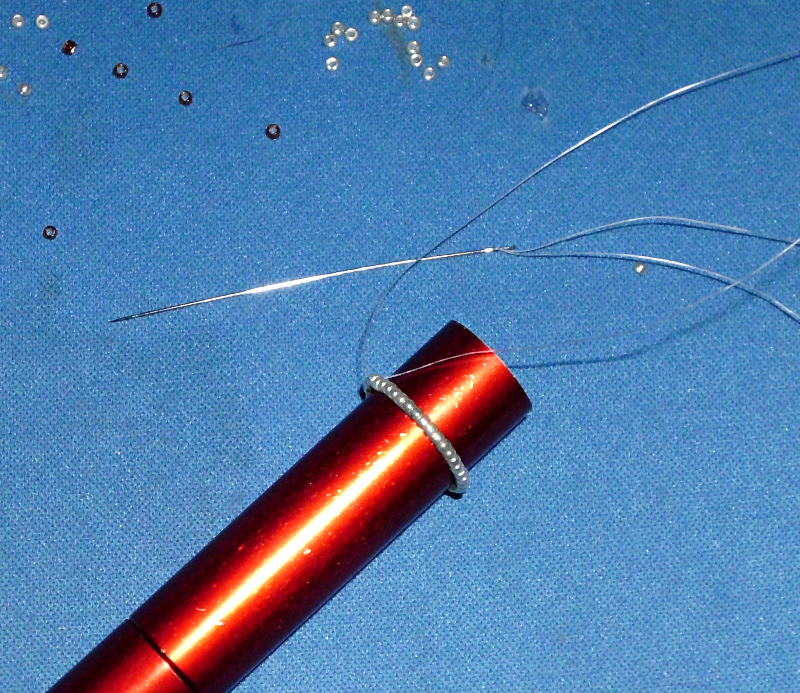
Pick up a bead, then string your thread through a bead in the first row. Snug up the bead; pick up another bead and skip the next bead in the first row, string your thread through the third bead and snug it up. Continue to add beads, every other one, all the way around.
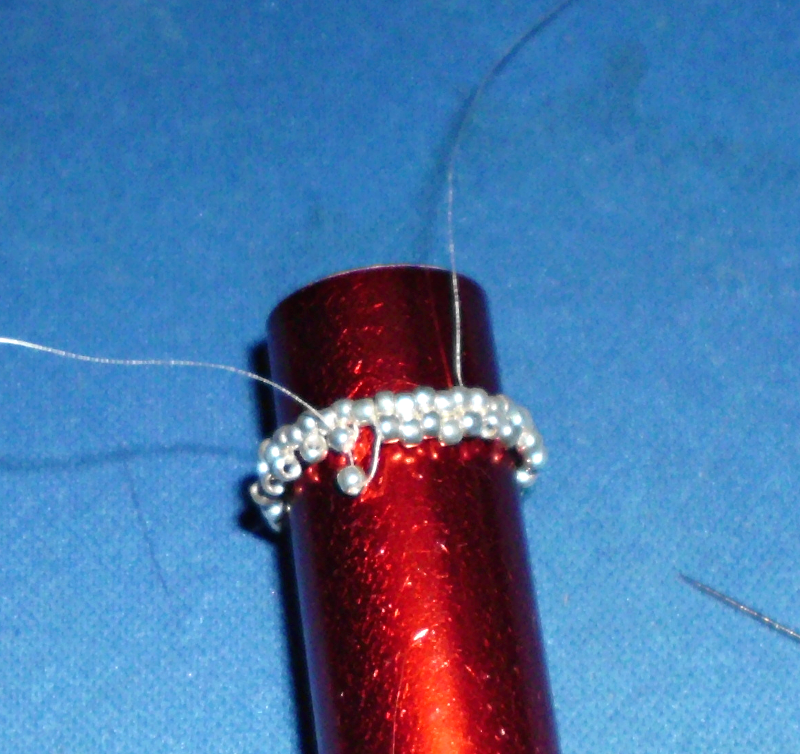
Continue to build the amulet, changing bead colors according to the pattern you have in mind.


When the amulet is the length you want, it’s time to cap it. My amulet is 1 ½ inches long. I removed it from the supporting surface, turned it around so the threaded end was on top, and began capping it off.
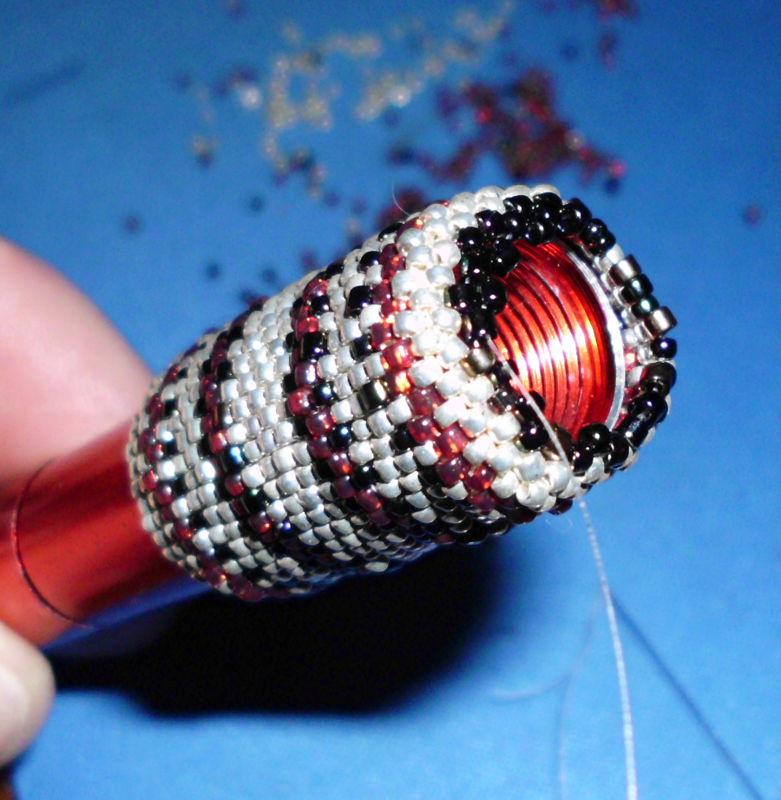
This is where doing your work over the end of a dowel is handy. The solid surface will support your beading and help keep it flat. This is also where Delicas come in handy. For my project, I worked a freeform cap. Skip a bead in each row and continue to snug up the thread as you go to get your work to shrink toward the center.
Here you can see how the beading rolls over the edge as I draw it in. I ran the thread around through the row of beads a couple of time in order to keep them flat and in place. It also strengthens the cap considerably.
Here is the finished cap. Since I didn’t have enough line to weave through the beading to the other end, I tied it off with a surgical knot, wove the extra thread through some beads and cut off the excess

I used the darker beads for the cap because they were the size of Delicas but I decided I didn’t care too much for the color so I went for a color change for the top cap. I also realized there were small gaps between the beads, so I decided to line the bottom with a piece of chamois.

I don’t want powdered herbal material to be leaking out while I wore the amulet! So I drew around the outside of the piece then cut the shape out and placed it in the amulet...
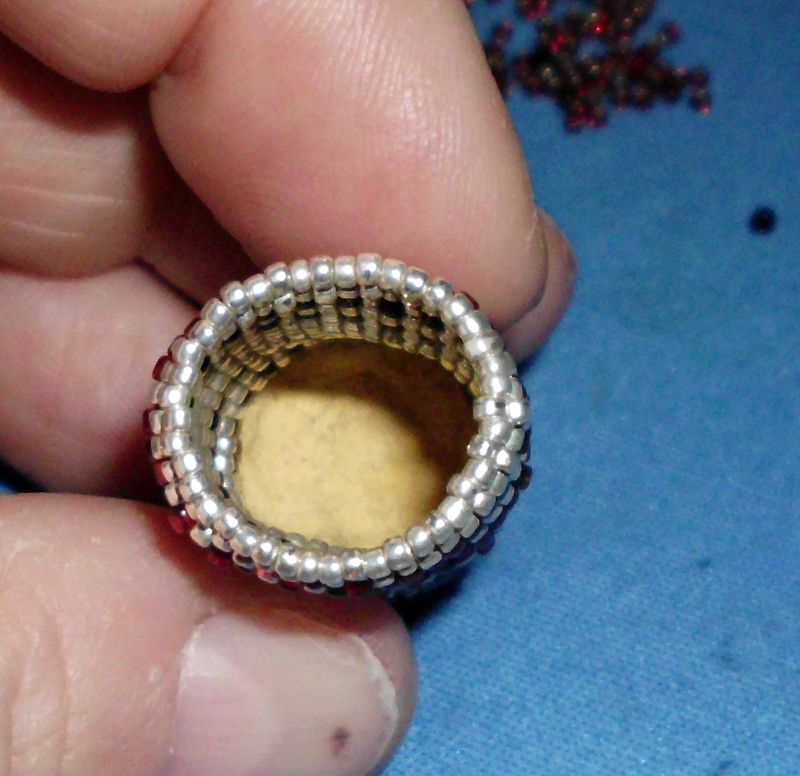
... and tamped it into place with the eraser end of my pencil. Now I can fill it to the top with my herbal mixture.

I attached more Fireline (best to do this before adding your herbs) and beaded the top cap, again in a freeform style, this time using mostly red beads mixed with the Purple Iris and a few bronze Delicas.

I added a couple of silver jump rings to make the bail. If you prefer, you can bead a bail instead. Another way to do this project would be to bead around a small, empty oil bottle, filling the bottle before screwing on the cap and then bead over the bottle cap. Bead the bottom and add your bail. This would give a firm structure to the entire piece.

Embellishments can be added by threading thin wire through the beads like I did with the jump rings, then shape the wire into small spirals and attaching larger beads as you go. Or, thread a bit of small link chain onto a loop attached to the bottom and add beads to the chain using small jump rings. Possibilities are endless! Another option is to add jump rings or fancy wire loops as bails on each end and wear your amulet horizontally rather than vertically.
Have fun beading your new magickal jewelry!
Comments
-
Please login first in order for you to submit comments


